Author Archives: dean132

VCAP6-CMA Deploy Exam Experience RANT!!!

Well I took the VCAP6-CMA Deploy exam a couple of days ago, and it’s taken me a couple of days to simmer down after my experience. I had so many issues whilst taking the exam, that if I had have posted about it straight away there would have been a lot of unsavoury language in here. I am not sure where the fault lies with the issues I had, but I have logged a complaint with both Pearson and VMware Education services. Be warned this post is nothing more than a bitter rant….

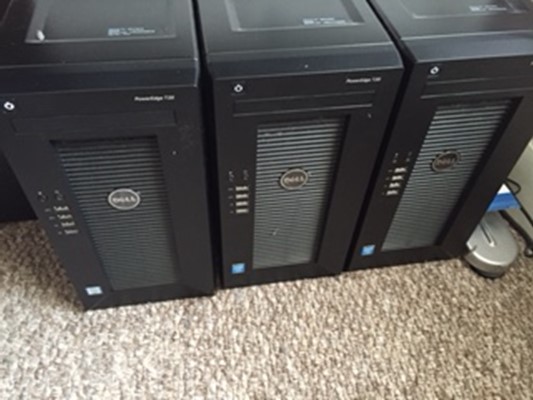
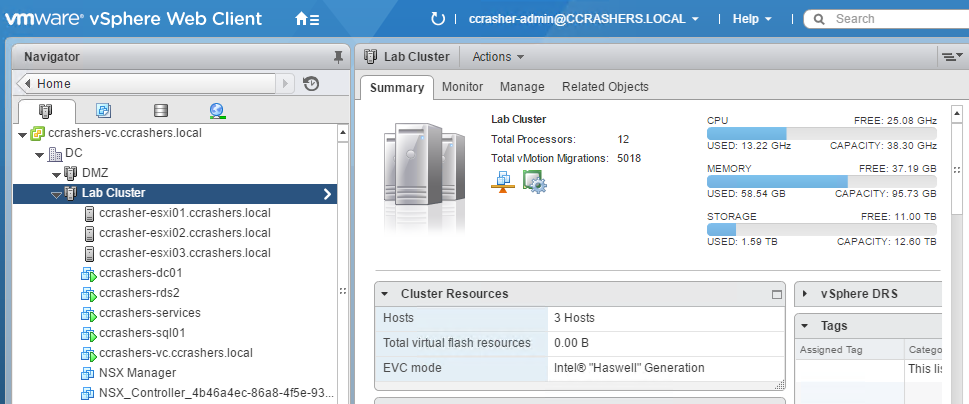
So this was the first VCAP exam I have sat, I read around the web for any tips I could find, and I used the VMware hands on labs briefly so I could familiar with the environment. The first bad omen was when I first sat at my workstation, the exam application crashed and I had to raise my hand and get the assessor to restart it. Once I got started, I encountered another small annoyance, the exam centre had old fashioned (see small) monitors, this meant that I couldn’t fit the question and the lab on the screen at the same time, but although not the best I could live with this. The main and most infuriating issue was the performance. The whole environment ground to a virtual halt, I was waiting anywhere from 10-15 seconds from mouse click to actual response, I raised my hand and told the exam centre staff what was going on, he cold booted my PC and moved me to a different workstation in the exam centre. After logging back in again, the lab seemed to run great…….for about 15 minutes……..and then again it ground to a halt mid question……..another hand raise and another cold boot and another new workstation (I’m not sure what moving workstations was supposed to resolve). Then whilst trying to reconnect to my console to a desktop I was using inside the exam lab, I watched around 3 minutes slip by…..whilst the console tried….and FAILED to reconnect……after a retry and another 3 minutes(ish) again, it failed to connect, eventually on the fourth attempt 12-14 minutes later I was connected back on my desktop and able to limp along with the questions again.

As well as the stress of moving around the exam centre, losing time waiting for the lab to respond, and the clear understanding that I wasn’t going to get to the end of this exam I admitted defeat and tried to get as much done as possible. I got to question 27, and before I could click OK (and 30 seconds earlier than the end) the exam exited and ended.

I told the exam staff I wanted to raise a complaint, they said they would raise an incident for me……I have emailed VMware Education services and also Pearson Vue and I am awaiting a response.

I am 99% certain I failed the exam, it takes 10 days to get your result, I am not even sure, that even if I answered every question correctly that I managed to get to, I would have answered enough questions to achieve a passing score. I cannot believe that for an exam as expensive as this one, the exam experience is the worst I have ever had. What’s worse if that the exam is based on 6.x and I believe that is out of support next year. I’ll wait for version 7 in the hope that they have improved the exam experience by then.

UPDATE 22/02/17: Pearson Vue have sent me a voucher for a free exam which has definitely eased my frustration, I am now over 2 weeks since taking the exam and I still haven’t received my result.

>

UPDATE 22/03/17: I finally received my result and I must say I was just as pleased as I was surprised to have passed!!! On to the Design exam now I suppose

Facebooktwittergoogle_pluslinkedinby feather

Upgrading vRA 7 to vRA 7.2

Upgrading vRA 7 to vRA 7.2


So I thought I would update my vRA 7.0.1 installation to the newly released 7.2.

I found the VMware upgrade document here and noticed there are some pre-requisites that must be in place before you perform the upgrade:

VMware Requirement

Minimum Required

My Appliance

Minimum RAM requirement

18GB

18GB

Minimum COU requirement

4 vCPUs

4 vCPUs

Minimum Disk 1 size

50GB

18GB

Minimum Disk 3 size

25GB

25GB

Minimum Disk 4 size

50GB

50GB

IaaS Web Server/Model Manager - Java version

Java 8 update 91 or higher

7 Update 67

MS SQL Server - Java version

Java 8 update 91 or higher

8 Update 111

IaaS Web Server/Model Manager - .Net version

4.5.2

4.5.1

MS SQL Server - .Net version

4.5.2

4.6.1

IaaS Web Server/Model Manager – Free disk space

5GB Available

20GB

MS SQL Server – Free disk space

5GB Available

30GB


The good thing is if your platform meets the minimum requirements you can go ahead and perform an in place upgrade. If like me you need to perform some remediation work most of the tasks are pretty straight forward.

On my lab installation, I am only using a single appliance and all of the IaaS components are installed on a single server, so it should go without saying that on a distributed environment there will be further steps to take.

Prerequisite Configuration

Java Upgrade 

Make sure when you are upgrading your Java version you are installing the x64 bit version, the version that automatically downloads from the java website appears to be 32bit, so I had to grab the offline x64 version. When I ran through the Java upgrade the installer prompted me to uninstall the older version of Java that was installed which was handy.

Make sure there is an environment variable for JAVA_HOME:

.Net Upgrade

I hadn’t run Windows Updates for a while on the IaaS server, I let that run through and the .Net updates were downloaded and then installed.

Resizing Disk 1 on the vRA appliance

OK so the most involved piece of the remediation work was actually resizing Hard Disk 1. There is a step by step guide on the VMware site here I thought I would run through it and point out any gotcha’s I find.

First off we need a spare Linux virtual machine, I am using a CentOS 7 machine, which also has the desktop GUI installed.

It should go without saying that in a production environment you need to backup all of your servers before you begin this, as I don’t currently have a backup solution in my lab I took a clone of the vRA7 appliance, and I took a snapshot of the IaaS Server and a backup of the SQL Server.

OK, so power off your vRA appliance, and increase the size of Hard Disk 1 to 50GB:

Then you need to add the vRA appliance primary disk to the spare Linux machine:

Log in to the CentOS machine and check the disk utility:

We can see that the vRA disk that has been added to the Linux is device “sdb”, so we need to use the disk partition management for the device:

Now to list the existing partitions type “p”:

You’ll need to take note of the partition table, as we’ll need the information a little later on.

Now we delete the existing partitions note: nothing is committed here until we write the changes
Type “d” and select partition 1 then do the same for partition 2:

Create Primary Partition

We need to create the new partitions now, type “n” and then “p” and choose partition 1. OK so this is where we need to check back with the partition table we printed off before.

Looking at the existing partition table above, we can see that the primary partition starts at block 2048, so select that as the first sector. For the last sector we need to do a quick calculation as you can see the default option would use up all available space, but we need to make sure we leave enough space for the swap partition, so what we do is work out the amount we need to reserve:

Swap Partition

End Block – 37748735
Start Block – 31438848

37748735 – 31438848 = 6309887

Available size – 104857599
Swap size – 6309887

104857599 – 6309887 = 98547712 (I rounded down to 98547711)

So the last sector figure we need is 98547711:

Now we make the partition bootable by typing “a” and selecting partition 1:

Create Swap Partition

Type “n” and “p” and choose partition 2, you can select the default starting and ending sectors here also:

Complete the process

Now we need to assign the partition code ID to each partition, again we get this from the original partition table:

Type “t” and then select the ID relevant for each partition (83 for the primary partition, 82 for the swap partition)

Before we commit the changes we should check the new partition table:

Providing you are happy with the new configuration write the changes and exit the partition tool by type “w”

Let’s format the swap partition by typing “mkswap /dev/sdb2”:

Now clean the primary partition by typing “e2fsck –f /dev/sdb1”:

Now resize the primary partition using “resize2fs –f /dev/sdb1”:

Looking at the disk utility I can now see my changes reflected:


Now remove the hard disk from the spare Linux machine, and ensure you do not select Remove and Delete option:

Power on the vRA appliance and hold your breath:

Install Updates

vRA Appliance Update

Stop the IaaS services on the IaaS server and then login to the vRA appliance VAMI on port 5480 e.g. vra.domain.local:5480

In my environment I have access to the internet from my vRA appliance so I will be using the default VMware repository:

Go to the Update tab and select “Check for Updates”:

Once the search has finished make sure you have a snapshot of the appliance and then Install Updates:


IaaS Server Update

There are 2 methods of upgrading the IaaS servers, you can use the “legacy” method by running the MSI installer or you can run the Upgrade Shell Script. As this is a lab and I only have 1 IaaS server I’ll quickly run through the MSI installer upgrade method. Obviously make sure you have a snapshot of you IaaS Server before starting this task, and make sure you have a backup of the MS SQL Database, just in case we need to restore it.

From the IaaS Server open a browser and go to https://vra-appliance-fqdn:5480/installer

Click on download the IaaS Installer and save the file to your desktop.

Run through the Wizard

Accept the EULA:

Enter the root account details and accept the certificate:

Let the installer check the pre-reqs and ensure everything is OK:

Make sure all of the components you need to update are selected, and ensure your service account is being used for the services:

As I have no PKI in my lab I deselected the use SSL for DB connection.

Now start the upgrade:

Once the upgrade has completed, you’ll see a new login screen:

You can also check the agent version from control panel / programs and features:

There you go, a fully updated vRA platform.


Facebooktwittergoogle_pluslinkedinby feather

vRA 7 Hanging at Checking for Updates

A nice quick and easy one for an issue I was having when trying to search for updates using VMware’s default repository from the vRA 7 VAMI.

For some reason the appliance was stuck at searching for updates, even after rebooting the appliance the status remained the same:


I initially let this run for over a day so it wasn’t a case of letting it finish.

To get round this issue, I had to change the settings for updates:

Before:


Change the settings to Automatic and then set a schedule the closest hour to your current time is best. You need to set the Update repository to something you aren’t using e.g. if your using the VMware default repository, select it to the CDROM and make sure you save your settings:

After:


Once the time you select passes by the search for updates will time out, and you’ll be able to revert your settings to the original and check again, in my case this worked the very next time:

I hope someone finds this helpful J

Facebooktwittergoogle_pluslinkedinby feather

Computer Crashers Lab

I thought I would give you a quick rundown on what I am using in my lab.

Compute

3 x Dell T20

Each with:

  • Intel Xeon E3-1225 3.2Ghz Quad Core processors
  • 32GB Ram
  • 8GB USB Drive for ESXi installation
  • 2TB SATA Drive


I purchased these from Servers Plus when they had a £100 cash back offer on, keep your eyes out for some bargains not just for Dell but all vendors.

To achieve what I wanted I added some hardware to the hosts, these added extras gave me the facility to split my networking requirements and also to run vSAN.

Added Extras:

  • Lycom DT-129, PCIe 3.0 x4 3.3V5A Host Adapter for PCIe-NVMe M.2 110mm SSD (Note: unsupported with my version of vSphere)
  • Samsung SM951 128GB M.2 PCIe NVMe High Performance SSD (Note: unsupported with my version of vSphere)
  • Intel Quad 82580EB Gigabit Ethernet Controller

vCenter / ESXi

I have deployed the VCSA version 6U2a (Build 4541948)

Each host is running version ESXi 6 updated to build 4600944


Storage

For my infrastructure VMs, I have deployed vSAN using the local 2TB HDD in each of the hosts and also the NVMe SSD.

I must say that I have been very impressed with the performance of vSAN.

I also have an HP Proliant Microserver which I have used to deploy iSCSI datastores.

The details of the HP server are:

  • AMD Turion(tm) II Neo N54L Dual-Core Processor
  • 16GB RAM
  • X4 1TB HDD
  • X1 1TB SSD
  • FreeNAS version 9.10.1


Networking

I have invested in an Ubiquiti EdgeSwitch ES-24-LITE Switch.

Now I like this switch, and I like Ubiquiti but I have had some issues with Jumbo Frames now working. After some back and forth with Tech Support a new firmware version has been released which I will give a try to and see if Jumbo Frames will start to work.

For my Host networking I am using 2 vDS, one for the management/infrastructure port groups and another for all of my tenant port groups, I am going to be running a lot of tests within vRA/vRO and I want to keep them separate.


Facebooktwittergoogle_pluslinkedinby feather

Creating Dynamic Menus in vRA 7 using SQL

In a previous post I explained how to create a dynamic menu using a vRO action. That works great, if the values are going to be static, however you don’t really want to be editing a vRO action every time someone makes a change to the available options.

In this post I will show how to use a vRO action that returns the values (in this case “Department”) that are stored in an SQL Database. We’ll first create a vRO workflow to test we are getting the results we require, and then we’ll create the Action using the workflow code. Finally we’ll create a vRA 7 custom property and apply it to a blueprint so it can be selected at request time.

Pre-Requisites:

A deployed vRA 7 platform

An Instance of vRO that has been configured to orchestrate your vRA 7 platform (endpoint / server configuration / vRA Plugin)

An SQL Database – That has been added to vRO – See this post for instructions on how to add an SQL DB to vRO


The Database

In my example, I have a SQL Database called vRA_Int, in that database I have a table called Departments with some values added:

You can check you can explore the SQL Database from vRO by going to the Administer view in the vRO client, and expanding the SQL Plugin option:

The vRO Workflow

So its time for the dreaded javascript piece, I’ll be honest, I am not a fan but I am learning and becoming much more comfortable with it now.

You’ll note from the workflow there are no Inputs or Outputs defined, I am just going to have the scriptable task define all of these:


Find the SQL Database

Next we need to define the SQL Database, you can use the vRO API Explorer to get the correct code required, it’s a bit clunky but once you get used to reading it things start becoming a little clearer:


var arrSQLDatabase = SQLDatabaseManager.getDatabases();

var objSQLDatabase = null;

for each (objSQLDatabase in arrSQLDatabase)

{

if (objSQLDatabase.name == "vRA_Int")

{

break;

}

}

Find the Required Table

We now need to define the table within the SQL Database:


var arrSQLTable = objSQLDatabase.getTables();

var objSQLTable = null;

for each (objSQLTable in arrSQLTable)

{

if (objSQLTable.name == "Departments")

{

break;

}

}

Define the SQL Query and return the results

Here we define the query, and we loop through the table to return all of the results that match our query. We then return the results to the system log:


var strQuery = "SELECT Department FROM Departments WHERE StatusID > 0";

var results = objSQLDatabase.readCustomQuery(strQuery);

var arrDepartments = new Array();


for (var i = 0; i < results.length; i++ ) {

var d = results[i];

arrDepartments.push(d.Department);

}

System.log (arrDepartments)

Save and Run the Workflow

You should now be able to run the workflow successfully, checking the Logs tab on the workflow history you should see the correct results returned:


The vRO Action

Once you are happy that your workflow is working correctly and returning the expected results, you’ll need to create an Action for vRA to be able to return the values from a Request Form.

Create the Action

Create a new Action in vRO, and then copy and paste the code from your scriptable task.

Edit the Action Script

We’ll need to make a couple of small changes for the action.

First we need to remove the System.log line and replace with return arrDepartments;

Second we need to define the Actions Return Type, this should be an Array of String:

And that should be all we need for the vRO action

The vRA Property Definition

Now we need to create the vRA property definition, which will then be applied to a blueprint:


Now you need to select the action:

Once completed the Property Definition can be applied it to a Blueprint like below:

Make sure you select “Overridable” otherwise the dropdown will be blanked out

Voila….

Facebooktwittergoogle_pluslinkedinby feather