Upgrading vRA 7 to vRA 7.2
So I thought I would update my vRA 7.0.1 installation to the newly released 7.2.
I found the VMware upgrade document here and noticed there are some pre-requisites that must be in place before you perform the upgrade:
VMware Requirement | Minimum Required | My Appliance |
Minimum RAM requirement | 18GB | 18GB |
Minimum COU requirement | 4 vCPUs | 4 vCPUs |
Minimum Disk 1 size | 50GB | 18GB |
Minimum Disk 3 size | 25GB | 25GB |
Minimum Disk 4 size | 50GB | 50GB |
IaaS Web Server/Model Manager - Java version | Java 8 update 91 or higher | 7 Update 67 |
MS SQL Server - Java version | Java 8 update 91 or higher | 8 Update 111 |
IaaS Web Server/Model Manager - .Net version | 4.5.2 | 4.5.1 |
MS SQL Server - .Net version | 4.5.2 | 4.6.1 |
IaaS Web Server/Model Manager – Free disk space | 5GB Available | 20GB |
MS SQL Server – Free disk space | 5GB Available | 30GB |
The good thing is if your platform meets the minimum requirements you can go ahead and perform an in place upgrade. If like me you need to perform some remediation work most of the tasks are pretty straight forward.
On my lab installation, I am only using a single appliance and all of the IaaS components are installed on a single server, so it should go without saying that on a distributed environment there will be further steps to take.
Prerequisite Configuration
Java Upgrade
Make sure when you are upgrading your Java version you are installing the x64 bit version, the version that automatically downloads from the java website appears to be 32bit, so I had to grab the offline x64 version. When I ran through the Java upgrade the installer prompted me to uninstall the older version of Java that was installed which was handy.

Make sure there is an environment variable for JAVA_HOME:

.Net Upgrade
I hadn’t run Windows Updates for a while on the IaaS server, I let that run through and the .Net updates were downloaded and then installed.

Resizing Disk 1 on the vRA appliance
OK so the most involved piece of the remediation work was actually resizing Hard Disk 1. There is a step by step guide on the VMware site here I thought I would run through it and point out any gotcha’s I find.
First off we need a spare Linux virtual machine, I am using a CentOS 7 machine, which also has the desktop GUI installed.
It should go without saying that in a production environment you need to backup all of your servers before you begin this, as I don’t currently have a backup solution in my lab I took a clone of the vRA7 appliance, and I took a snapshot of the IaaS Server and a backup of the SQL Server.
OK, so power off your vRA appliance, and increase the size of Hard Disk 1 to 50GB:

Then you need to add the vRA appliance primary disk to the spare Linux machine:

Log in to the CentOS machine and check the disk utility:

We can see that the vRA disk that has been added to the Linux is device “sdb”, so we need to use the disk partition management for the device:

Now to list the existing partitions type “p”:

You’ll need to take note of the partition table, as we’ll need the information a little later on.
Now we delete the existing partitions note: nothing is committed here until we write the changes
Type “d” and select partition 1 then do the same for partition 2:

Create Primary Partition
We need to create the new partitions now, type “n” and then “p” and choose partition 1. OK so this is where we need to check back with the partition table we printed off before.

Looking at the existing partition table above, we can see that the primary partition starts at block 2048, so select that as the first sector. For the last sector we need to do a quick calculation as you can see the default option would use up all available space, but we need to make sure we leave enough space for the swap partition, so what we do is work out the amount we need to reserve:
Swap Partition
End Block – 37748735
Start Block – 31438848
37748735 – 31438848 = 6309887
Available size – 104857599
Swap size – 6309887
104857599 – 6309887 = 98547712 (I rounded down to 98547711)
So the last sector figure we need is 98547711:

Now we make the partition bootable by typing “a” and selecting partition 1:

Create Swap Partition
Type “n” and “p” and choose partition 2, you can select the default starting and ending sectors here also:

Complete the process
Now we need to assign the partition code ID to each partition, again we get this from the original partition table:
Type “t” and then select the ID relevant for each partition (83 for the primary partition, 82 for the swap partition)

Before we commit the changes we should check the new partition table:

Providing you are happy with the new configuration write the changes and exit the partition tool by type “w”

Let’s format the swap partition by typing “mkswap /dev/sdb2”:

Now clean the primary partition by typing “e2fsck –f /dev/sdb1”:

Now resize the primary partition using “resize2fs –f /dev/sdb1”:

Looking at the disk utility I can now see my changes reflected:

Now remove the hard disk from the spare Linux machine, and ensure you do not select Remove and Delete option:

Power on the vRA appliance and hold your breath:

Install Updates
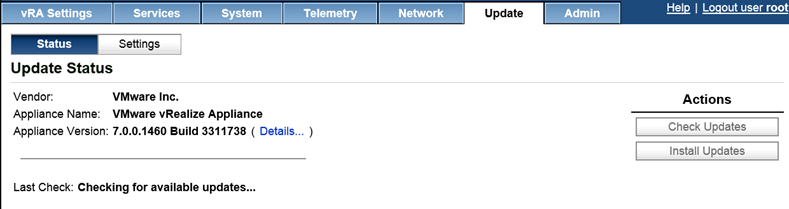
vRA Appliance Update
Stop the IaaS services on the IaaS server and then login to the vRA appliance VAMI on port 5480 e.g. vra.domain.local:5480
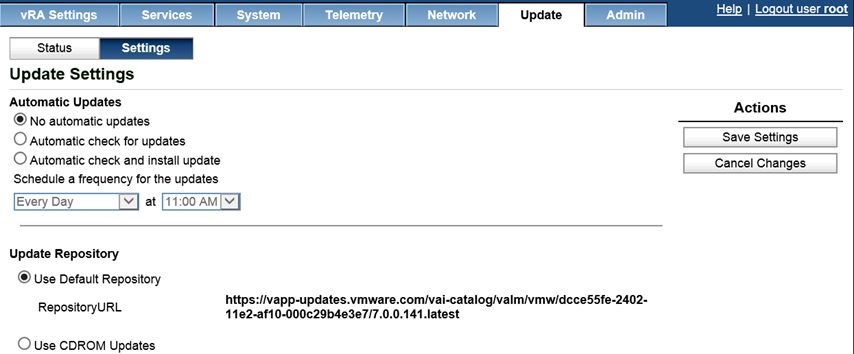
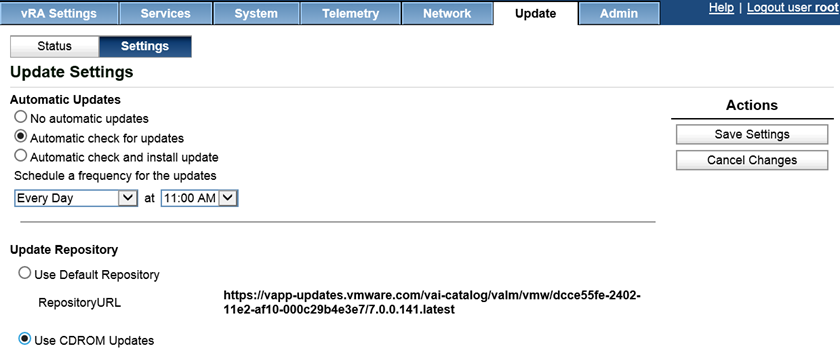
In my environment I have access to the internet from my vRA appliance so I will be using the default VMware repository:
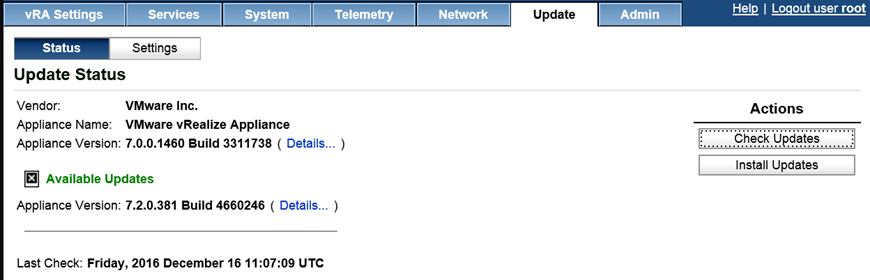
Go to the Update tab and select “Check for Updates”:

Once the search has finished make sure you have a snapshot of the appliance and then Install Updates:


IaaS Server Update
There are 2 methods of upgrading the IaaS servers, you can use the “legacy” method by running the MSI installer or you can run the Upgrade Shell Script. As this is a lab and I only have 1 IaaS server I’ll quickly run through the MSI installer upgrade method. Obviously make sure you have a snapshot of you IaaS Server before starting this task, and make sure you have a backup of the MS SQL Database, just in case we need to restore it.
From the IaaS Server open a browser and go to https://vra-appliance-fqdn:5480/installer

Click on download the IaaS Installer and save the file to your desktop.
Run through the Wizard

Accept the EULA:

Enter the root account details and accept the certificate:

Let the installer check the pre-reqs and ensure everything is OK:

Make sure all of the components you need to update are selected, and ensure your service account is being used for the services:

As I have no PKI in my lab I deselected the use SSL for DB connection.
Now start the upgrade:

Once the upgrade has completed, you’ll see a new login screen:

You can also check the agent version from control panel / programs and features:

There you go, a fully updated vRA platform.